SAM-EM
Comprehensive application and framework for multiple particle segmentation and tracking in liquid phase TEM
Abstract
The absence of robust segmentation frameworks for noisy liquid phase transmission electron microscopy (LPTEM) videos prevents reliable extraction of particle trajectories, creating a major barrier to quantitative analysis and to connecting observed dynamics with materials characterization and design. To address this challenge, we present Segment Anything Model for Electron Microscopy (SAM-EM), a domain-adapted foundation model that unifies segmentation, tracking, and statistical analysis for LPTEM data. Built on Segment Anything Model 2 (SAM-2), SAM-EM is derived through full-model fine-tuning on 46,600 curated LPTEM synthetic video frames, substantially improving mask quality and temporal identity stability compared to zero-shot SAM-2 and existing baselines. Beyond segmentation, SAM-EM integrates particle tracking with statistical tools, including mean-squared displacement and trajectory distribution analysis, providing an end-to-end framework for extracting and interpreting nanoscale dynamics. Crucially, full fine-tuning allows SAM-EM to remain robust under low signal-to-noise conditions, such as those caused by increased liquid sample thickness in LPTEM experiments. By establishing a reliable analysis pipeline, SAM-EM transforms LPTEM into a quantitative single-particle tracking platform and accelerates its integration into data-driven materials discovery and design.
Installation
Prerequisites
- Miniconda (or Anaconda) must be installed on your machine. Download it from https://docs.conda.io/en/latest/miniconda.html.
- Git must be installed. On Mac it comes with Xcode Command Line Tools (you may be prompted to install these on first run). On Windows, download from https://git-scm.com.
- An NVIDIA GPU with CUDA support is recommended for fast inference. The application will run on CPU but slower. The launcher scripts automatically detect your GPU and install the appropriate version of PyTorch.
- Download the SAM-EM model checkpoint from HuggingFace: https://huggingface.co/sam-em-paper/finetuned-checkpoint/tree/main and place it in the
checkpoints/folder inside the repository. - Clone this repository (SAM-EM):
git clone https://github.com/JamaliLab/SAM-EM.git. Subsequent installation steps should be completed within the resulting directory unless otherwise specified.
Quick Launch (Recommended)
The launchers below will automatically create the SAM-EM-app conda environment and install all dependencies on the first run (5–15 minutes). Subsequent launches open the app directly.
Windows
Double-click launch_app.bat. A terminal window will appear showing setup progress on the first run, then the application will open.
Mac
Open a terminal in the repository folder and run:
chmod +x launch_app.sh
./launch_app.sh
On Mac, chmod +x only needs to be done once. After that you can also right-click the file in Finder → Open With → Terminal.
Note: On Apple Silicon Macs (M1/M2/M3), you must use the ARM version of Miniconda (labeled “Apple M1” or “arm64”), not the Intel version.
Manual Installation
If you prefer to set up the environment yourself rather than using the launcher scripts:
conda create -n SAM-EM-app python=3.10 pip -y
conda activate SAM-EM-app
pip install torch==2.5.1 torchvision==0.20.1  # CPU
pip install "sam-2 @ git+https://github.com/facebookresearch/sam2.git"
pip install numpy==2.2.6 pillow==12.2.0 matplotlib==3.10.8 scikit-image==0.25.2 pandas==2.3.3 hydra-core==1.3.2 iopath==0.1.10 omegaconf==2.3.0 tqdm==4.67.3 customtkinter==5.2.2 CTkMessagebox==2.7 CTkColorPicker==0.9.0
If you have an NVIDIA GPU and want CUDA support, replace the pip install torch==2.5.1 torchvision==0.20.1 line with:
pip install torch==2.5.1+cu121 torchvision==0.20.1+cu121 --index-url https://download.pytorch.org/whl/cu121
Then launch the application from the application/ directory:
cd application
python app.py
This is the main screen.
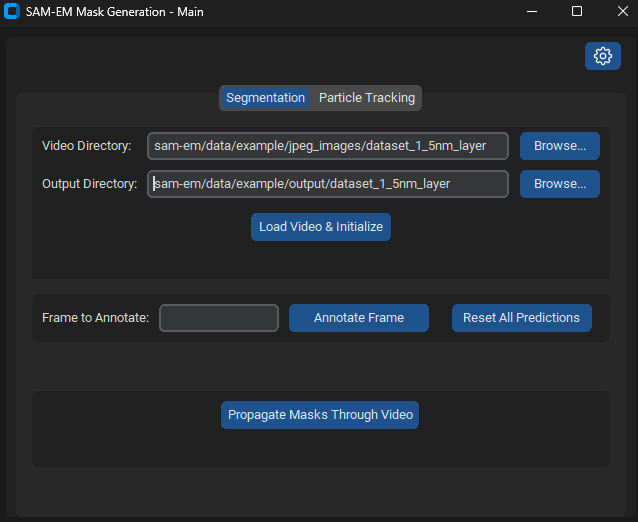
The checkpoint and config paths are detected automatically. If you followed the steps above (checkpoint in checkpoints/, config yaml in the repo root), everything should work out of the box. The gear icon (top-right) can be used to override these paths if needed.
Specify the video directory which contains the video frames and the output directory. Press load video and initialize. Then select annotate frame 0, and press annotate frame.
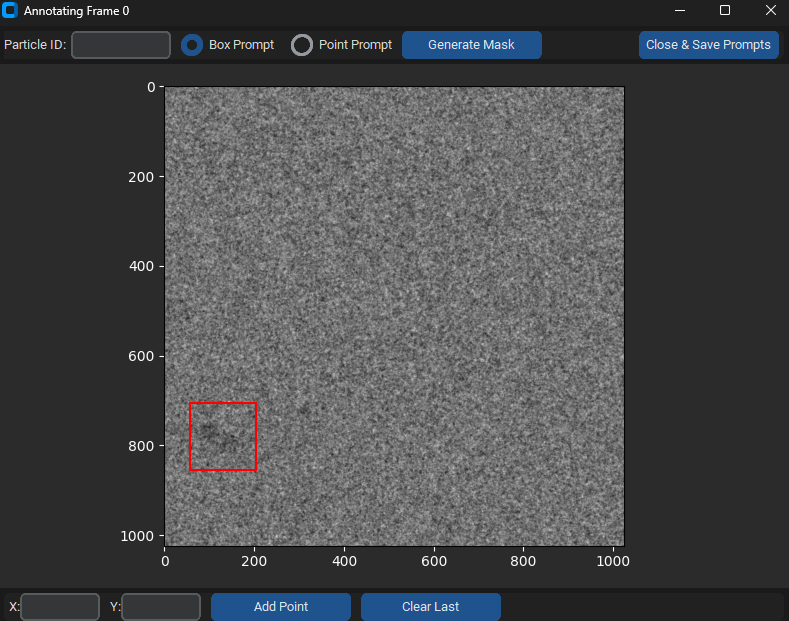
For each particle prompt annotation, enter the particle ID starting from 0 then 1, etc. Then drag a box prompt around the particle. Press generate mask, then move on to select prompts for all other particles. When you are done, select close and save prompts. On the main screen, press propogate masks, with results being stored in the output folder.
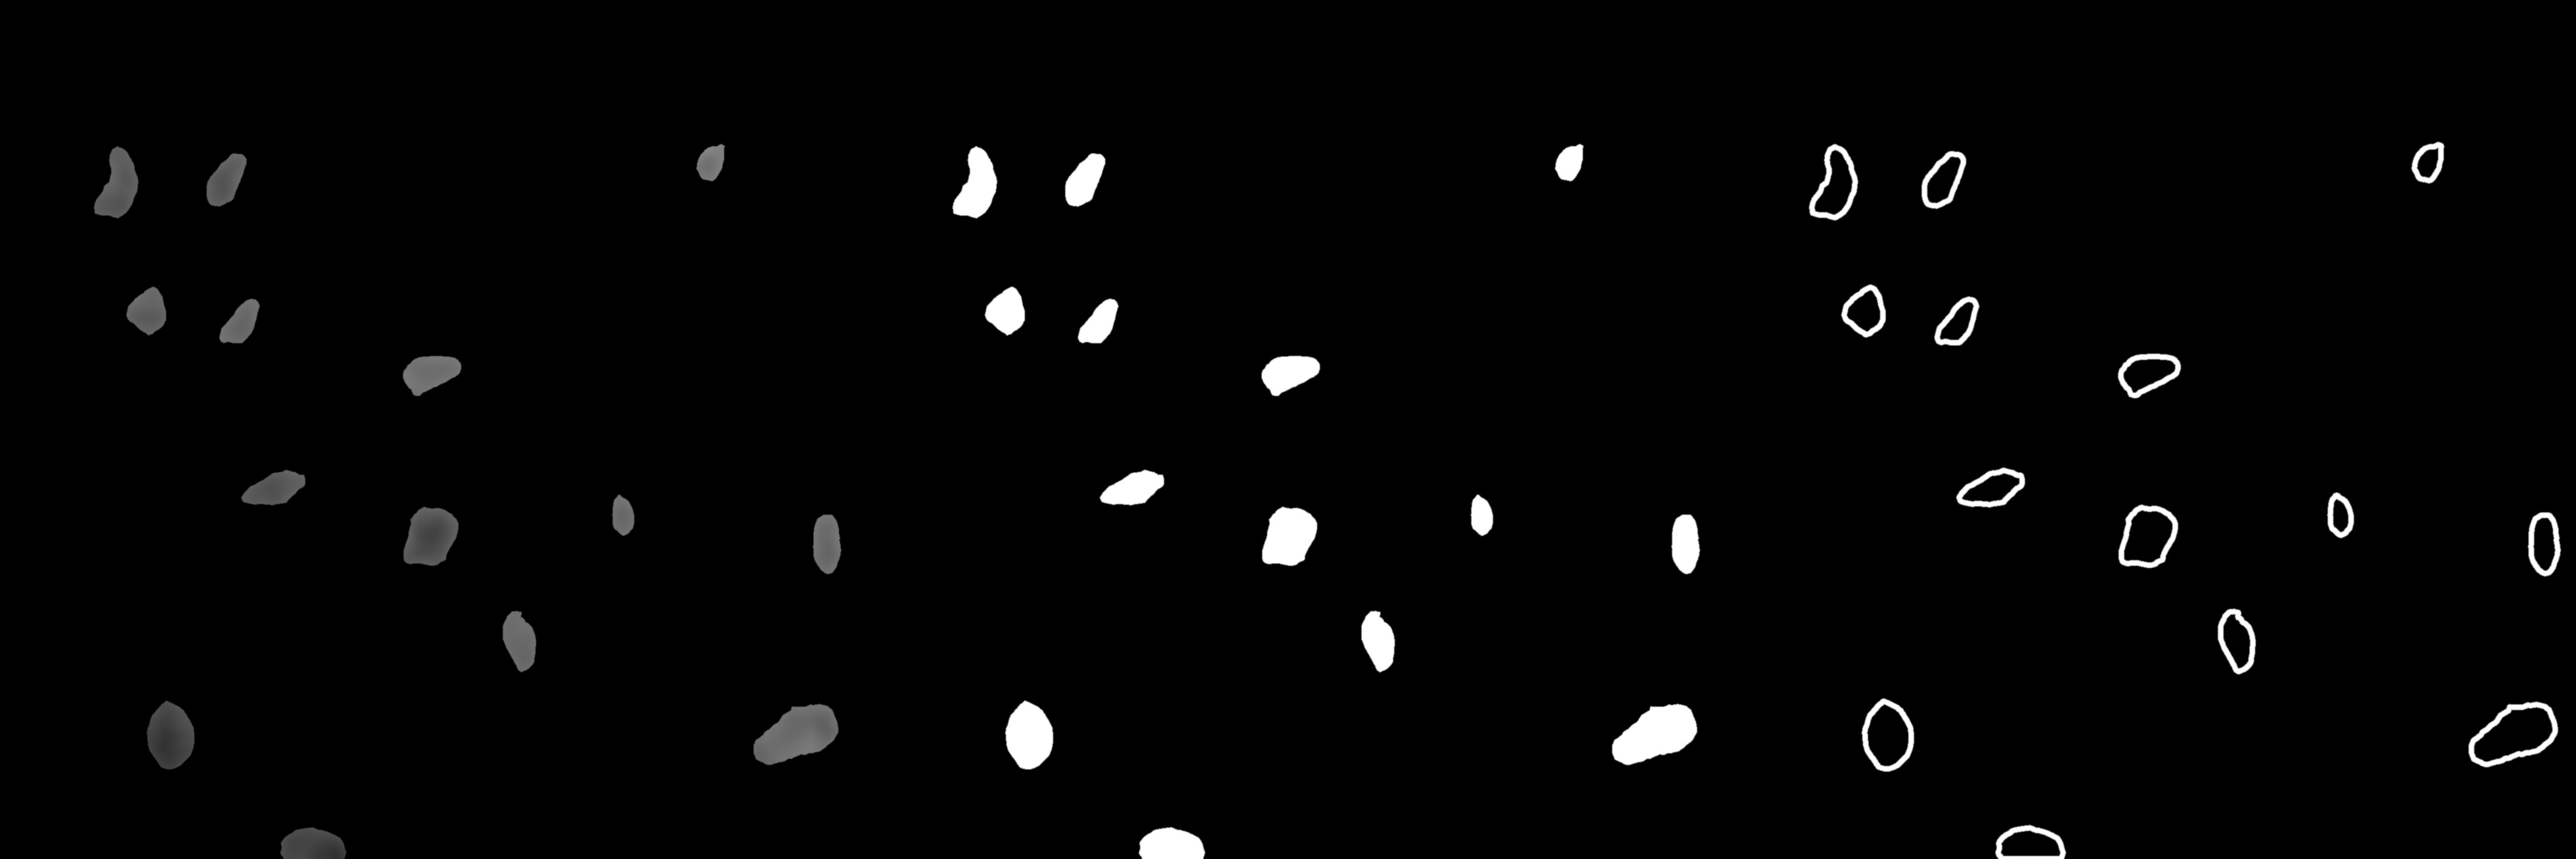
An example video of the drawn masklets can be seen as following:
For the particle tracking portion of the application, click on particle tracking on the top element to get to the main screen of particle tracking.
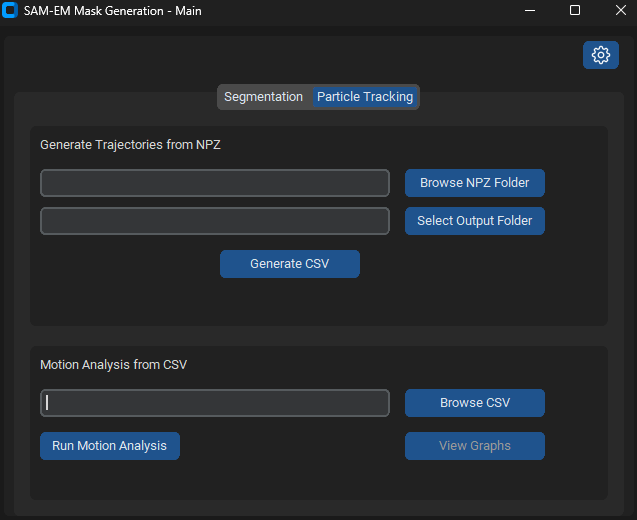
Then browse the output folder for the output csv, and press run motion analysis.
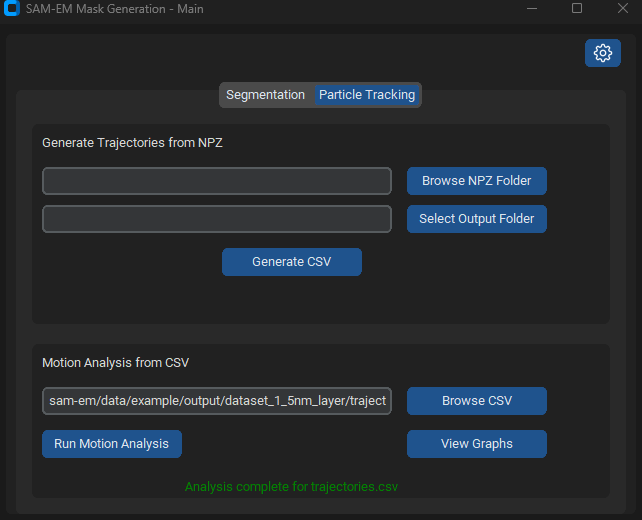
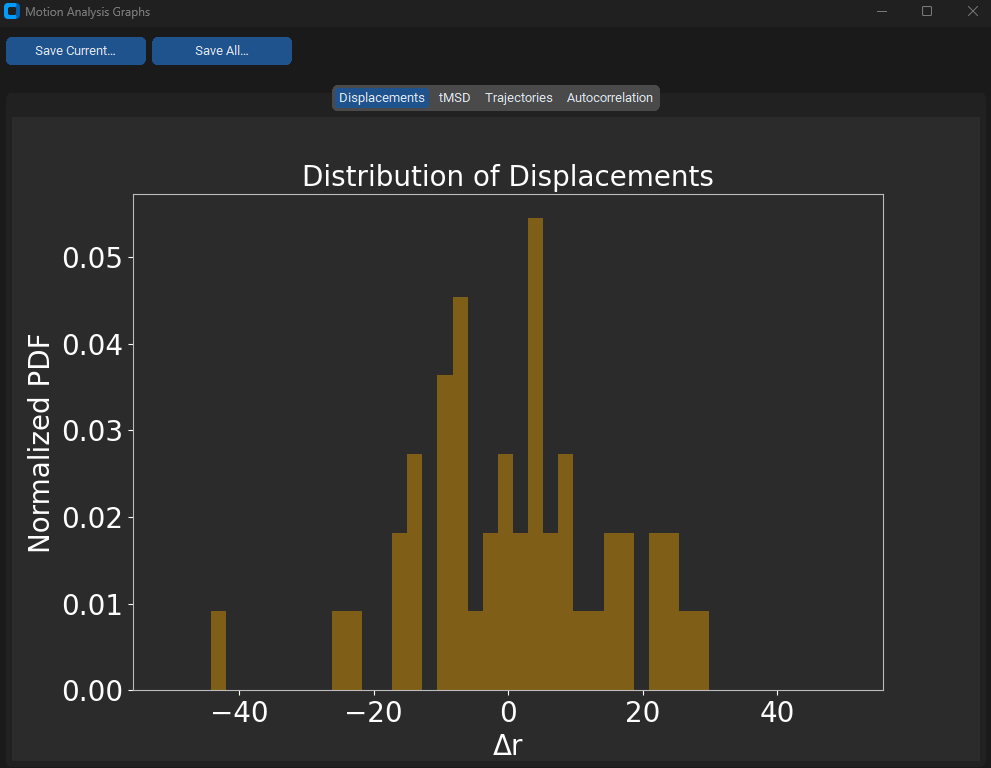
Finally, press view graphs.
Model Training
To conduct training in accordance with the procedure established in the paper, utilize the ‘finalconfig.yaml’ configuration file (within main branch of repository) in the training process to establish training parameters and other configurations appropriately.